

Buying Guide
How to Buy a Film and Slide Scanner
This short guide helps you choose the right scanner to digitise negatives, slides and motion film. It covers the key buying factors, the main product types, the crucial specifications to check and practical tips so you can act with confidence.
Key factors to consider
Decide what you will scan most often and how you want the files delivered:
- Formats supported - 35mm, 110, 126, medium mounts, 50mm slides, 8 mm and Super 8 motion film each need specific holders or a dedicated device.
- Volume and speed - batch feeders and continuous trays suit large archives; single-frame or frame-by-frame devices are better for careful restoration or motion film.
- Quality needs - choose higher optical resolution and better dynamic range if you plan prints, heavy editing or professional restoration.
- Ease of use - standalone units that save to an SD card are convenient if you do not want to use a computer.
- Budget - high-end film scanners give better colour and detail but cost more; cheaper units are fine for casual sharing and snapshots.

Types and important specifications
Understand the common categories and the specs that matter:
- Dedicated 35mm and slide scanners - built for still film, usually offer high optical dpi and software control for the best results.
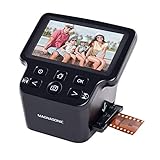
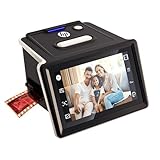
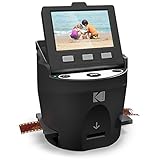
- All-in-one film and slide scanners - compact, often with a built-in screen and adapters for multiple formats; quick and simple for home users.
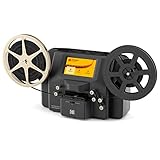
- Motion film digitizers - designed for 8 mm and Super 8 reels, often record frame by frame to MP4 and may be portable.
- Key specs to check:
- Optical resolution - higher dpi gives more detail for small negatives, but very high numbers can be marketing; match resolution to your output needs.
- Dynamic range (Dmax) and multi-exposure - more important than raw dpi for recovering shadow and highlight detail from negatives.
- Infrared dust and scratch removal - useful for saving retouch time.
- Colour calibration - IT8 or similar targets and calibration support give more accurate, consistent colour.
- Connectivity and file formats - SD card export, USB, HDMI and support for JPEG/TIFF/MP4 depending on media type.
- Included software - good scanning software can save hours; check whether professional packages are bundled.
Where to buy and mistakes to avoid
Choose the right purchase path and avoid common pitfalls:
- Online shopping gives more choice and reviews; check seller ratings, return policy and warranty terms.
- Retail stores let you see the device and ask questions, but selection can be limited for specialist scanners.
- Check what is included - adapters, reels, cleaning tools, power cables and whether memory cards are supplied.
- Common mistakes to avoid:
- Assuming the highest dpi number equals best image quality - dynamic range, optics and software matter more.
- Buying a model that does not support your film formats or that lacks calibration options.
- Overlooking storage and backup needs for large high-resolution files.
- Scanning fragile, mouldy or badly degraded film at home without professional assessment.
Expert tips and final buying checklist
Quick, practical advice to get results you will keep:
- Start with a trial scan of representative frames to confirm colour, detail and scan time before committing to a large project.
- Use multi-exposure and calibration targets when possible to improve tonal range and colour accuracy.
- Clean film gently with a soft brush or blower and repair torn edges before scanning.
- Choose infrared dust-removal if you want less manual retouching.
- Prefer a standalone unit if you want fast, simple SD-card output; pick a computer-connected scanner if you need full software control and higher fidelity.
- For valuable, mouldy or fragile film, consider professional digitising services rather than consumer equipment.
- Back up final files in at least two locations and keep original negatives stored safely.
Final Thoughts
Match the scanner to the film formats and quality you need, check dynamic range and software as much as resolution, and confirm what accessories and support are included. If you need speed and convenience, choose a standalone converter; if you want the best possible image for restoration or printing, choose a higher-spec scanner with calibration and professional software.