


Buying Guide
How to Buy Film and Slide Scanners
This short guide helps you choose the right film and slide scanner for digitising old negatives and slides. It covers what matters most, the main types you will find, the key specs to check and practical buying tips so you can act quickly and confidently.
Key factors to consider
Purpose first: archive for long term preservation or convert quickly for sharing. Image quality needs differ. Budget and time - do you want batch speed or single-frame quality. Film types you own - 35mm, 110, 126, mounted slides, Super 8 and 8mm require different adapters or scanners. Workflow - do you want direct-to-SD card scanning without a PC or a scanner that integrates with desktop software for advanced editing. Ease of use and physical size - some units are compact all-in-one devices with an LCD, others are desktop scanners that sit on your desk and connect to a computer.
Types available
- High-resolution desktop film scanners - designed for archiving. Typical strengths: very high optical resolution (for example up to 7200 dpi), greater dynamic range, multi-exposure capture and infrared dust-detection for automatic dust and scratch removal. They rely on a PC and include professional imaging software.
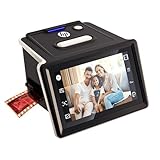
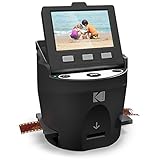
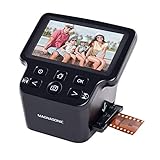
- Standalone film-to-digital converters with LCD - self-contained units that scan directly to an SD card or USB. Typical strengths: ease of use, fast batch feeding with quick-feed trays, built-in screens (around 3.5 to 7 inches) for previewing and basic editing, and support for multiple film sizes. They are best for quick conversions and sharing.
- Hybrid options - midrange devices trade some quality for convenience. Choose these if you need a balance of decent scans and simple operation.
Important features and specifications to check
- Resolution - Desktop scanners list optical dpi (higher is better for archiving). Standalone units often quote megapixels; compare intended use rather than numbers alone.
- Dynamic range (Dmax) - higher Dmax preserves shadow detail in old negatives; this matters for faded or high-contrast originals.
- Dust and scratch removal - look for an infrared channel or multi-exposure options to reduce post-scan retouching.
- Software and file formats - professional software and TIFF output are useful for archiving; JPEG may be fine for casual use.
- Film format support - confirm adapters for 35mm, 110, 126, mounted slides and Super 8/8mm if needed.
- Direct-to-storage and connectivity - SD card saving, USB-C, HDMI or PC connection; check maximum card capacity supported.
- Screen size and preview - larger LCDs speed up visual checks; useful for standalone converters.
- Speed and batch handling - quick-feed trays and continuous scanning matter when you have large reels or many strips to convert.
- Compatibility and extras - check Mac/Windows support, included cables, cleaning brush, and whether software licences are included.

Where to buy, common mistakes to avoid and expert tips
- Where to buy - online retailers give the best selection and price comparison; check seller ratings, returns, warranty and stock levels. Retail stores let you test build quality and screen size before you buy.
- Common mistakes - confusing sensor megapixels with true optical dpi; assuming fast standalone scanners match the quality of a dedicated desktop scanner; buying without checking card capacity and included adapters; skipping dust-cleaning steps and then blaming the scanner for poor results.
- Expert tips - if you are archiving, choose a scanner with high dpi, good Dmax and an infrared dust-removal channel. For fast family sharing choose a standalone unit with a larger LCD and direct-to-SD capability. Always do a test scan and compare results at your target output size. Clean negatives gently before scanning and store originals safely afterwards. Back up high-resolution scans to more than one place.
Final Thoughts
Decide whether your priority is archival quality or fast, easy conversions. For long-term preservation choose a high-resolution desktop scanner with strong dynamic range and dust-removal features. For quick, user-friendly results choose a standalone converter with a good LCD and adapters for your film types. Check connectivity, included accessories and warranty before you buy and run a few test scans to confirm the quality meets your needs.


